Setting up reaper
1. Download and install Reaper from reaper.fm.
After successful install, keep reaper closed for the following steps.
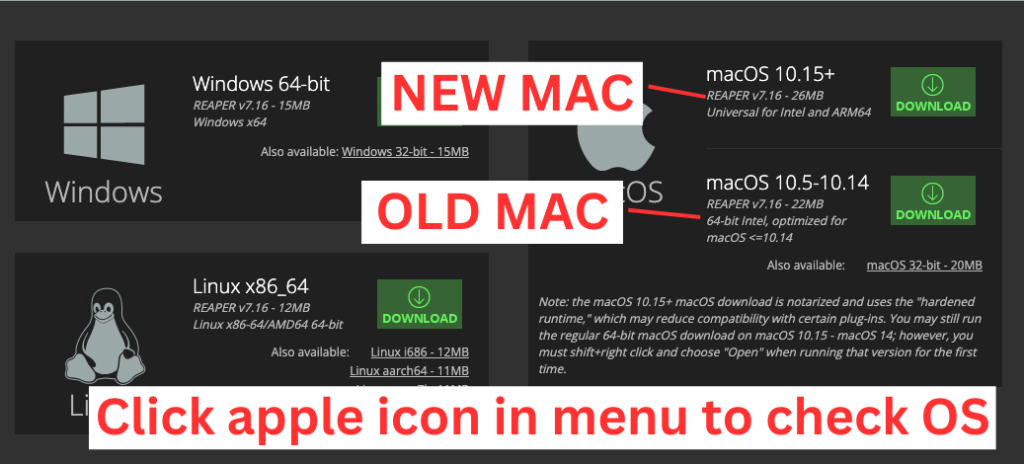
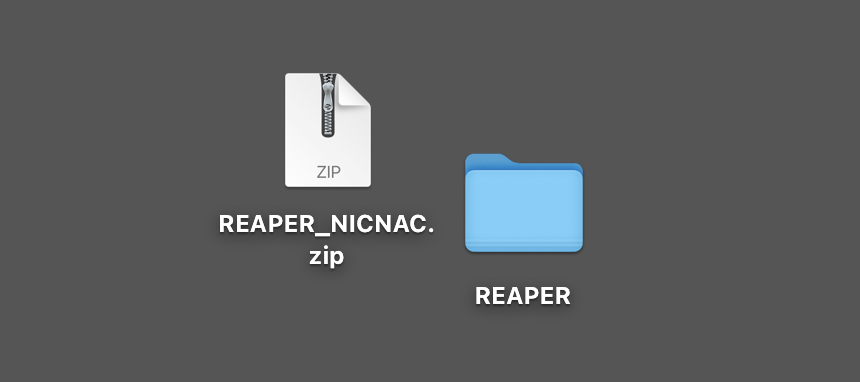
2. Click this button to download the required files to your desktop.
3. Double click to Unzip this folder. Ensure this folder is called REAPER (all caps)
4. Open the Application Support folder [user > Library > Application support].
This path can be tricky to find because the Library folder is often hidden. To find it, hold down option on the keyboard while clicking Go in the apple menu bar (top of your screen). ‘Library’ will appear, click it.
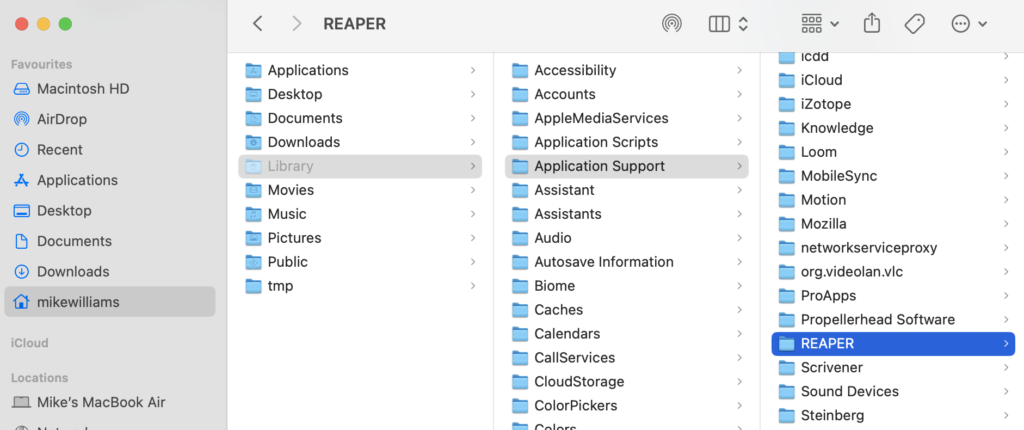
5. Move the folder on your desktop into the Application Support folder.
If there’s already a REAPER folder there, replace it entirely (NB rename and move the old folder if you want to retain a copy of your earlier Reaper setup).
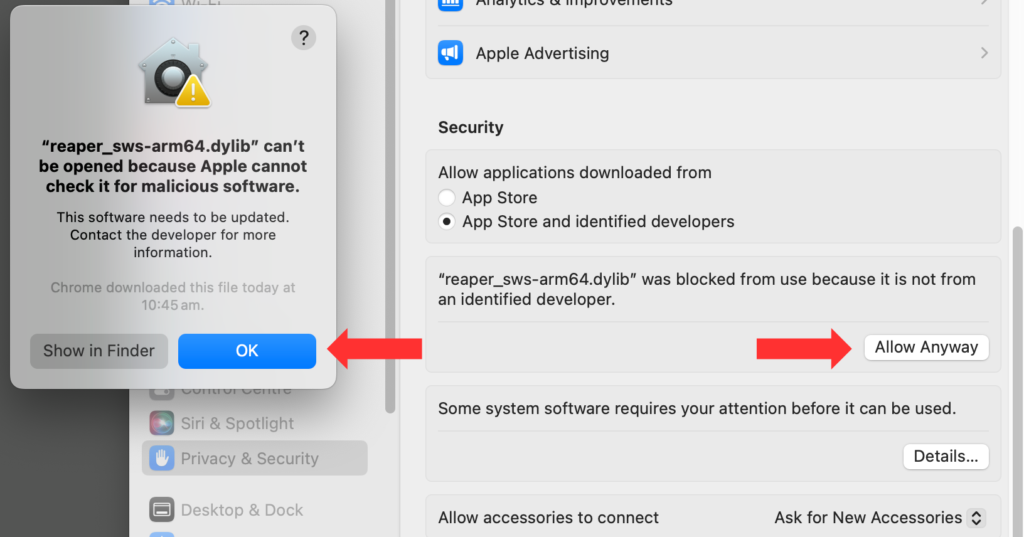
6. Open Reaper. You’ll get an Operating System security pop-up message. You will need to manually approve some extensions.
Open System Preferences > Privacy and Security. If there’s a padlock icon, ensure it’s unlocked.
Click ‘OK’ and ‘Allow Anyway’ (or ‘Allow To Run’) until there are no more pop ups and Security messages.
Close Reaper.
7. Open reaper again. It is normal to see more Security pop ups.
If prompted, click ‘Show in Finder’ or pull up the UserPlugins folder [user > Library > Application support > UserPlugins]
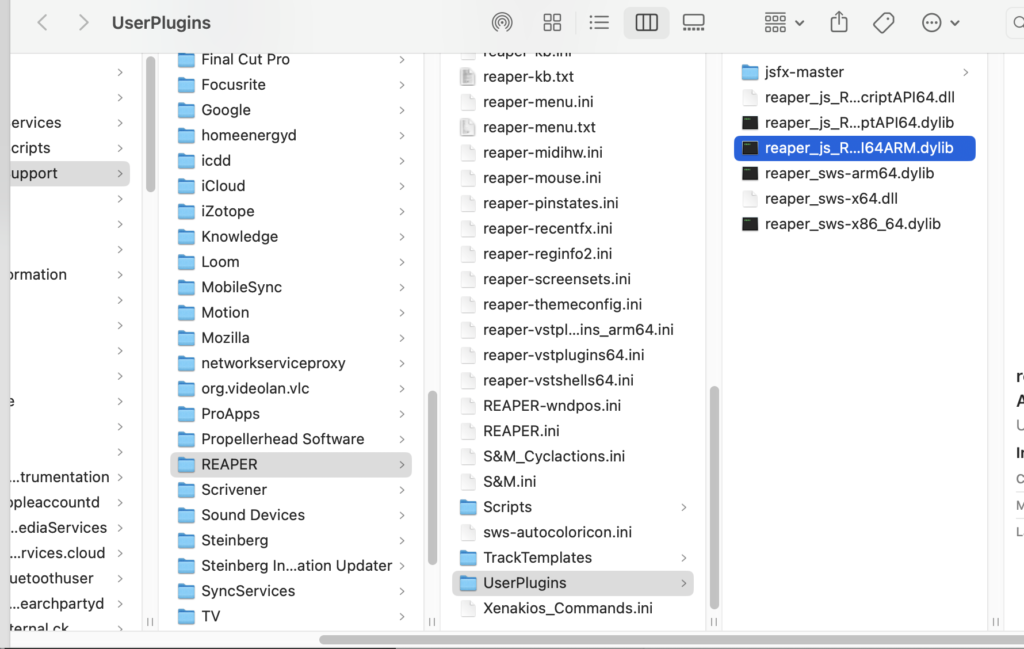
With the System Preferences > Security menu open, double click on each of the files with a ‘.dylib’ extension.
Again, if these prompt a Security message click ‘Open Anyway’.
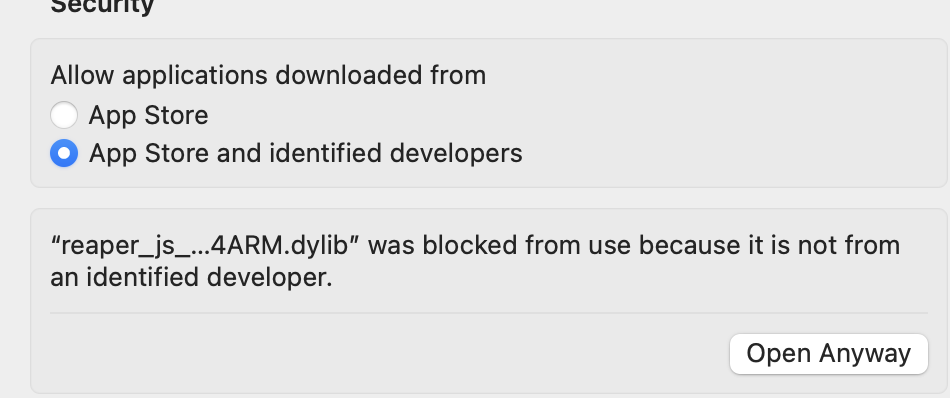
Close Reaper and then open it again. If further pop up/Security messages appear, repeat the above steps until it opens without an issue.
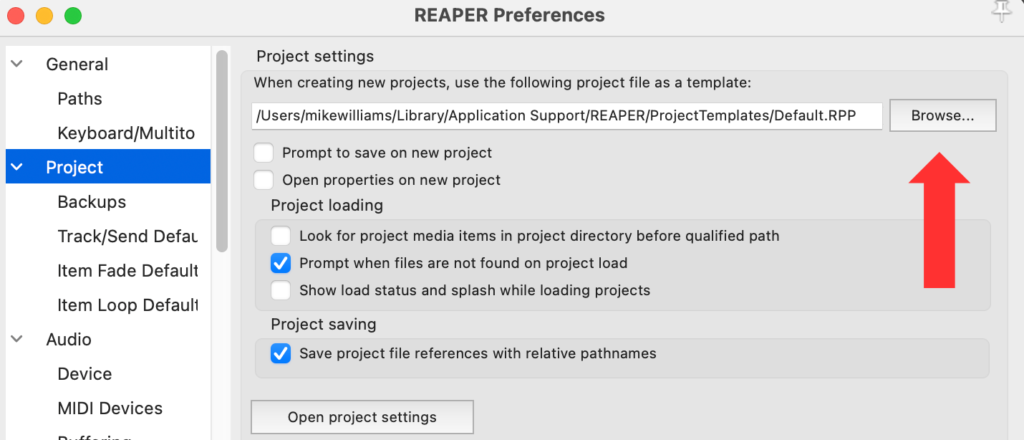
8. Finally, if you see a Reaper popup saying ‘The default project couldn’t be found’ close this popup and within Reaper, go to Options > Preferences > Project. The first field in this window is the default project template location. Click on Browse and then select “Default” to reconnect the file path to your device.
Test it works
With the config installed successfully, the top toolbar in Reaper should look something like this:

Test the config is operating as it should by dragging a clip onto the montage, then:
- Hit ‘v’ on a clip, should see straight red volume line
- Hit ‘control n’ to see normalisation and automation
Also please note! Occasionally, some shortcuts do not connect. The most common is toggle ripple editing [the ~ key]. Reconnect or change any shortcut: Reaper Preferences > Keyboard Multitouch > Assign Keyboard shortcuts. Further instruction on modifying shortcuts on the Reaper Explainers page.